Military Boutique
A downloadable game
My first project for the Mastered Game Developer course and first project for Unreal Engine in general.
You can download the game here: Google Drive Link
You can find the GitHub repo here: https://github.com/Woeger/Military-Boutique
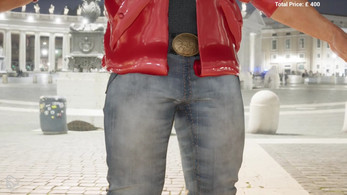
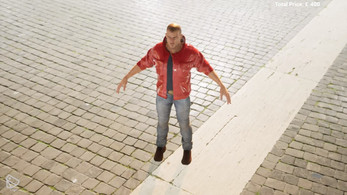
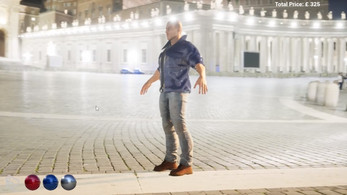
The brief was to create a configurator which could be used as a feature in a larger game, such as being able to customise a car. While many went the route of vehicles, I wanted to make something I could more easily see myself using in other projects, so I settled on a character creator of sorts.
CONTROLS:
Camera: Mouse
Zoom: Mouse Wheel
CODE:
As this was my first project in the engine I'm still learning the ropes here and everything is done within blueprints, but here are some code highlights.
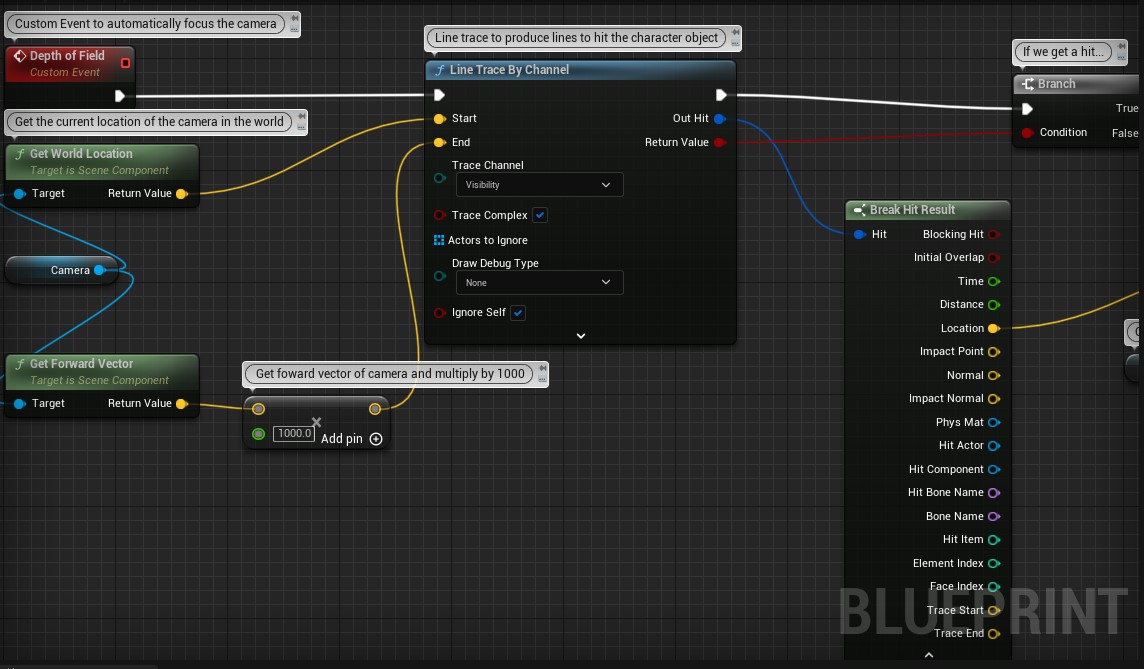
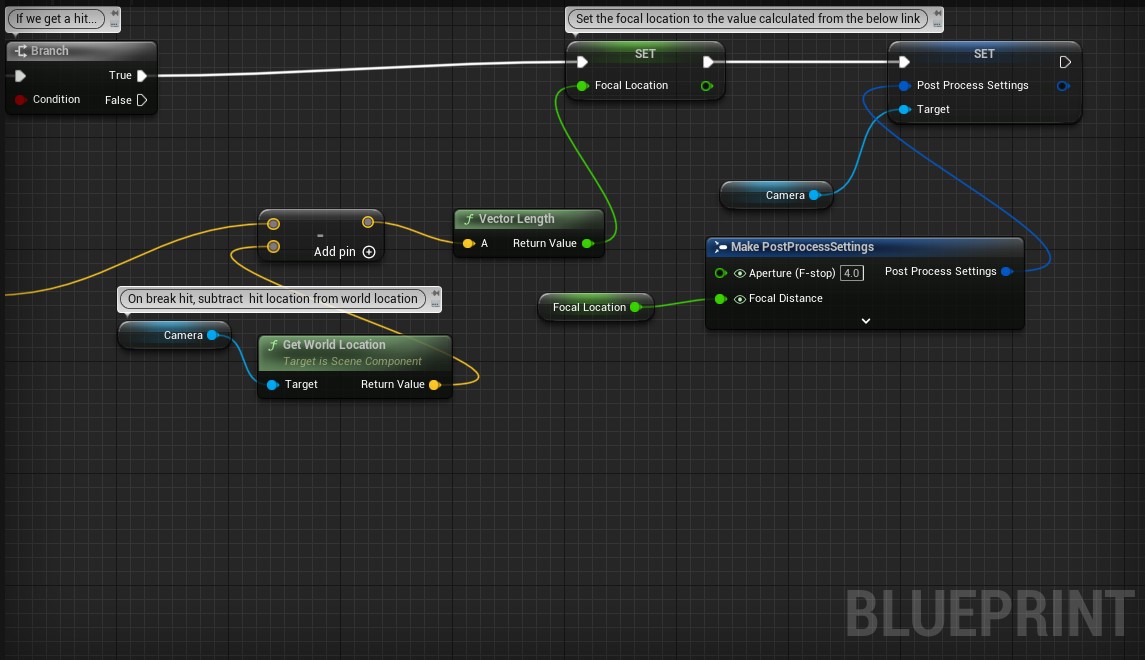
This excerpt is from the pawn blueprint, which is what I use to control the camera for the project. Most code in here is fairly standard (e.g a spring arm with a camera attached that gets shorter or longer when the scroll wheel is used, or changes the pitch/yaw on mouse movement) but there is this pretty cool function that changes the depth of field.
The comments explain a lot of this, but I'm using a custom event (which is called whenever we want the camera to refocus, for example after a zoom) which when called performs a line trace. A line trace is used here as we want to know how far away our central object (being the character) is to adjust the focal length which will allow us to focus on that object.
We trace from the camera itself (by getting its position in the world) to 1000 units in front of the camera, which we get by obtaining the forward vector in a similar away and multiplying that vector by 1000. If we get a hit within that trace, the true block will execute. We take the position of the object we just hit and get its distance from the camera, this is then set as the new focal length in the post processing settings.
The other interesting bit of code is how I create that fading effect for changing colours. See below for the code.
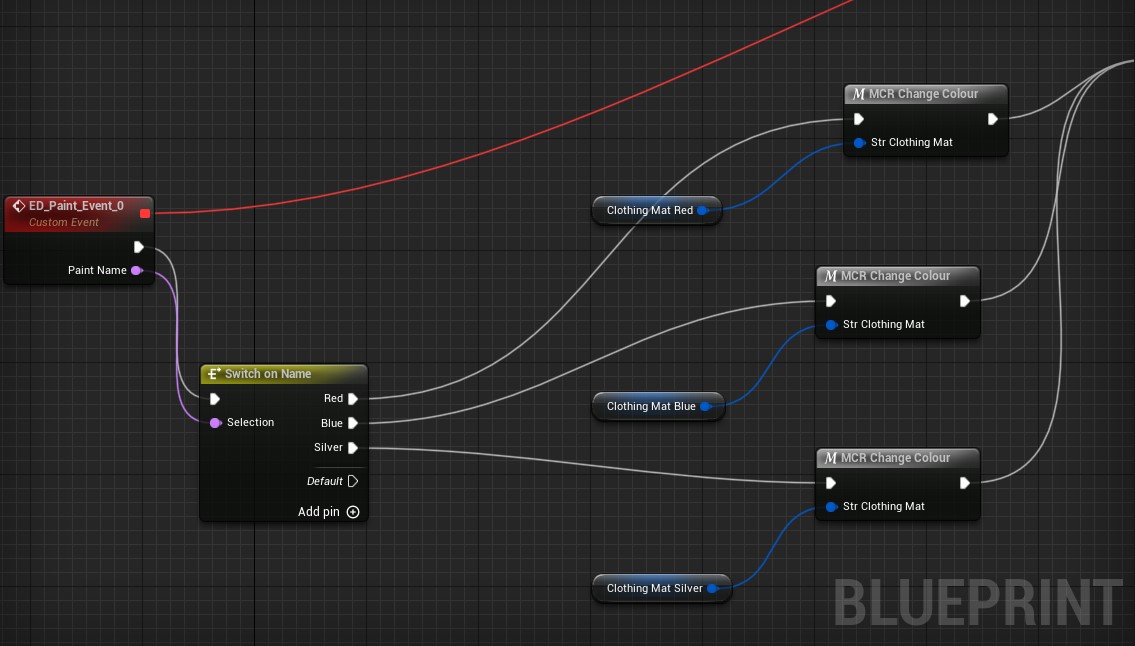
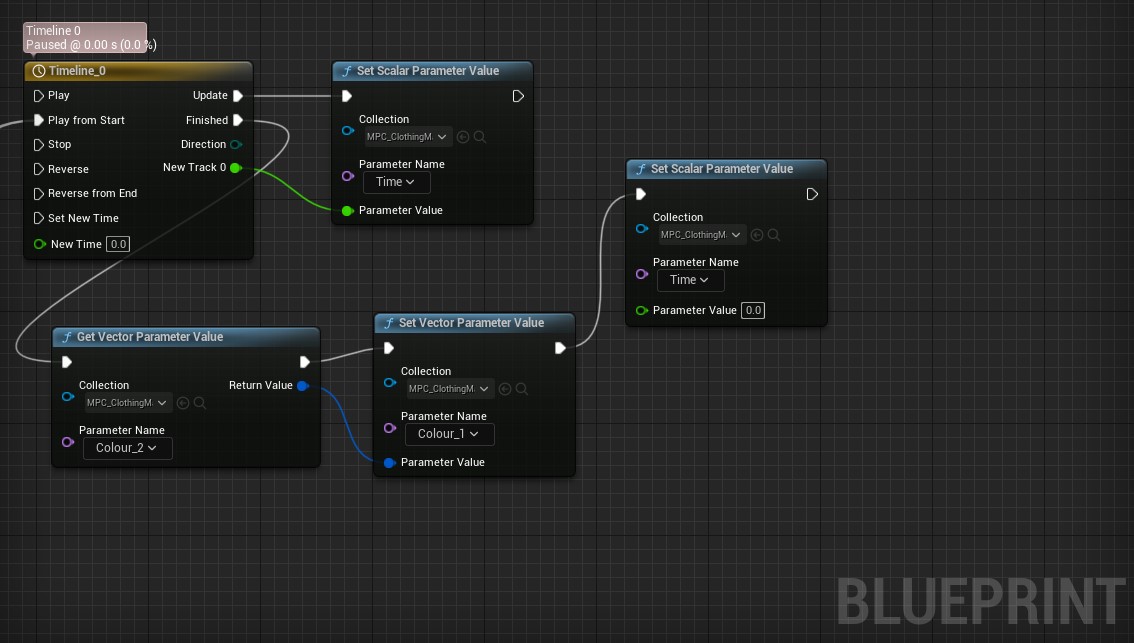
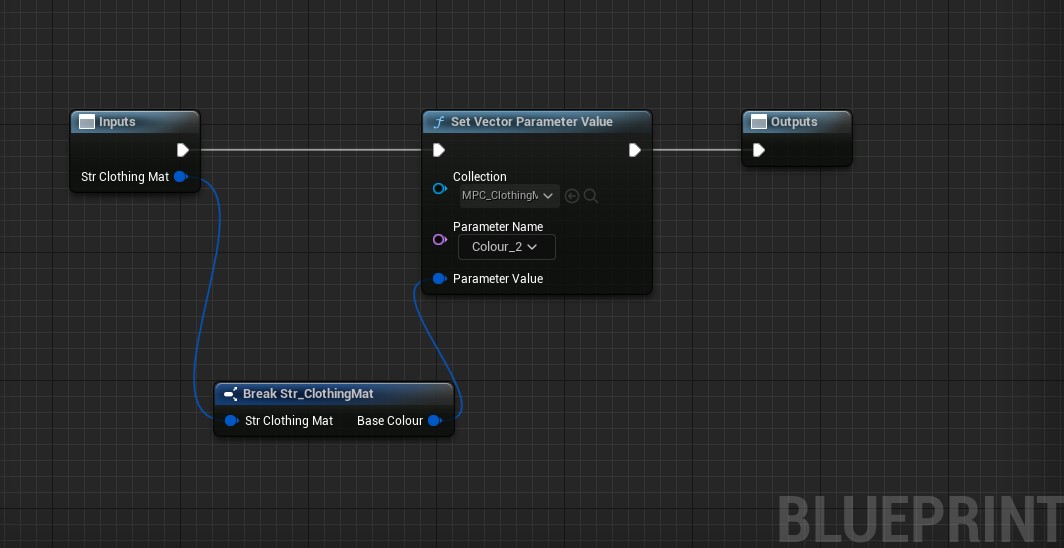

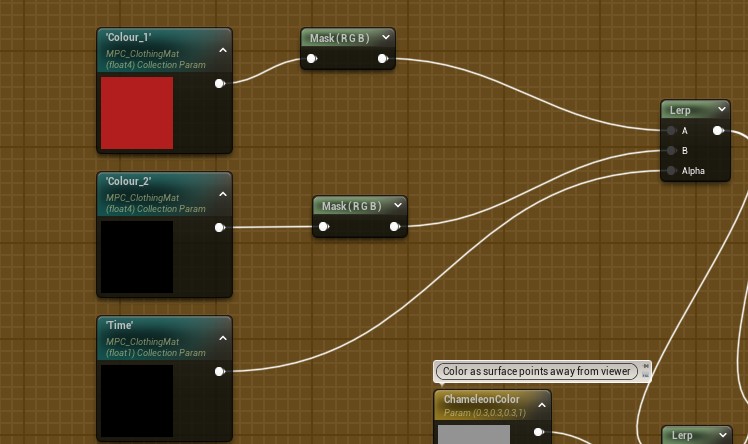
We start off with an event which is called when one of the buttons in the menu is pressed, which outputs the name of whatever colour was chosen. This fires off a switch statement based on that name to change a variable inside of a 'Material Parameter Collection' I made called colour 2. We then start a timeline.
All the magic happens inside the code for the material itself. That variable we set earlier is part of a pair, colour 1 and colour 2. Colour 1 is our current colour and colour 2 is the one we're going to blend to. Through the use of lerp nodes we're able to create that blending effect, taking in an Alpha of 'time' which is based on our linear timeline back inside of the blueprint.
The last important step is to set colour 1 to whatever we changed to after the blend has happened ensuring that it sticks to the new colour selected.
| Status | Prototype |
| Author | Thomas Sutton |
Leave a comment
Log in with itch.io to leave a comment.